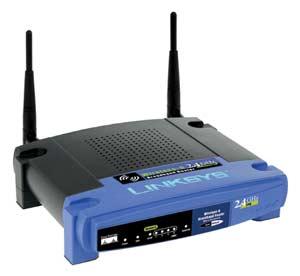
[lang_en]After failing to configure more than one wlan onto my new wrt160nl, I’ll tried the same with my old wrt54gl.

The setup:
-One WLAN ( secure ) ,directly connected to my LAN
-One WLAN ( unsecure) , for testingpurpose only for a few hosts. This net wil be routed to the LAN.
The accessiblity will be managed by the Firewall and my dhcpd
The second wlan will simply added to /etc/config/wireless ( same physical interface)
config wifi-device  wl0

        option type  broadcom

        option channel  7

config wifi-iface

        option device           wl0

        option network          lan2

        option mode             ap

        option ssid             lulu

        option encryption       none

        option hidden           1

        option dns              192.168.1.1

        option gateway          192.168.3.2

        option dhcp             192.168.1.1

config wifi-iface

        option device           wl0

        option network          lan

        option mode             ap

        option ssid             lala

        option encryption       psk

        option key              secret

        option hidden           1

        option dns              192.168.1.1

        option gateway          192.168.1.1

        option dhcp             192.168.1.1
after a „wifi down && wifi up“ you’ll now see Interface wl0.1.
I had two change the following in the /etc/config/network
-I need a new vlan ( 2) . The Vlan1 was for the WAN Interface, the physical interface is now in VLAN 0 ( LAN) so I have 5 Interfaces for the LAN.
-For both WLANs you have to configure the bridge interfaces.
-under /etc/firewal.user you have to adapt the firewall .
#### VLAN configuration

config switch eth0

        option vlan0    "0 1 2 3 4 5*"

        option vlan1    "5*"

        option vlan2    "5*"

#### Loopback configuration

config interface loopback

        option ifname   "lo"

        option proto    static

        option ipaddr   127.0.0.1

        option netmask  255.0.0.0

#### LAN configuration

config interface lan

        option type     bridge

        option ifname   "eth0.0"

        option proto    static

        option ipaddr   '192.168.1.98'

        option netmask  255.255.255.0

        option gateway  '192.168.1.1'

        option dns      '192.168.1.1'

##### VLAN 2 , Bastenwlan

config interface        lan2

        option type     bridge

        option ifname   "eth0.2"

        option proto    static

        option ipaddr   '192.168.3.2'

        option netmask  '255.255.255.0'

        option dns      '192.168.1.1'

        option dhcp     '192.168.1.1'
thats all
[/lang_en][lang_de]
Nachdem ich scheiterte, dem WRT160NL mehr wie ein Wlan beizubringen . Deswegen stürzte ich mich auf meinen alten Router WRT54gl und siehe da, es geht doch.

Das Szenario:
-Ein WLAN ( sicher ) ,das direkt mit dem LAN verbunden ist
-Ein WLAN ( unsicher) , für Testzwecke, das in das Haupnetz geroutet wird und nur wenigen ausgesuchten Hosts offensteht ( durch den dhcp und die Firewall geregelt )
Unten die /etc/config/wireless in der das zweite wlan einfach hinzugefügt wird ( gleiches physkalisches Interface)
config wifi-device  wl0

        option type  broadcom

        option channel  7

config wifi-iface

        option device           wl0

        option network          lan2

        option mode             ap

        option ssid             lulu

        option encryption       none

        option hidden           1

        option dns              192.168.1.1

        option gateway          192.168.3.2

        option dhcp             192.168.1.1

config wifi-iface

        option device           wl0

        option network          lan

        option mode             ap

        option ssid             lala

        option encryption       psk

        option key              secret

        option hidden           1

        option dns              192.168.1.1

        option gateway          192.168.1.1

        option dhcp             192.168.1.1
nach einenm wifi down && wifi up ist nun das Interface wl0.1 entstanden.
In der /etc/config/network ist folgendes zu ändern.
-Ein neues vlan ( 2) ist anzulegen. Das Vlan1 war für das WAN Interface, da physikalischen Interface ist aber nun im VLAN 0 ( LAN). So habe ich in meinem WLAN 5 Interfaces
-Für die Beiden WLANs werden die beiden Bridge Interfaces konfiguriert.
-unter /etc/firewal.user ist noch die Firewall anzupassen.
#### VLAN configuration

config switch eth0

        option vlan0    "0 1 2 3 4 5*"

        option vlan1    "5*"

        option vlan2    "5*"

#### Loopback configuration

config interface loopback

        option ifname   "lo"

        option proto    static

        option ipaddr   127.0.0.1

        option netmask  255.0.0.0

#### LAN configuration

config interface lan

        option type     bridge

        option ifname   "eth0.0"

        option proto    static

        option ipaddr   '192.168.1.98'

        option netmask  255.255.255.0

        option gateway  '192.168.1.1'

        option dns      '192.168.1.1'

##### VLAN 2 , Bastenwlan

config interface        lan2

        option type     bridge

        option ifname   "eth0.2"

        option proto    static

        option ipaddr   '192.168.3.2'

        option netmask  '255.255.255.0'

        option dns      '192.168.1.1'

        option dhcp     '192.168.1.1'
thats all
[/lang_de]
